Cloudy’s Chalkboard: Use a Workflow to send an Email
Using workflows in salesforce.com to automate your business processes saves you time, money and frustrating busywork. Today, we will set up a workflow to send an email. Emails can be automatically sent not only to salesforce.com users, but to other employees, business partners, and customers. Merge fields in the email template can bring in the recipient’s name as well as other information from their record.
If you are not yet using workflows, you might not know when you should use one! Here are some examples of when you might use a workflow to send an email:
-When an Opportunity worth more than $50k is Closed-Lost, the sales manager should be notified for follow-up.
-When a Sales Rep completes a demo with a client, a Thank You email should be sent to the client.
-When a new Account is created in a given geographic location, the regional manager should be notified.
These specific examples might not apply to your business, but can help you start thinking about the kinds of events and processes in your org that should trigger an automatic email or alert.
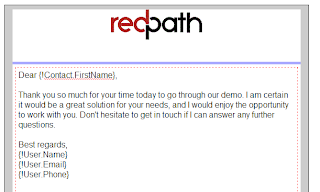
Step 1: Create the Email Template
 |
| The Merge Fields on your template should be related to “Contact.” For step-by-step instructions to create an email template, check out Cloudy’s Chalkboard: How to Create an Email Template. Be sure to mark the “Available for Use” checkbox before you are done! |
Step 2: Create the Workflow Rule
- Go to Setup>Create>Workflow & Approvals>Workflow Rules and click “New.”
- Select the object where the trigger action will occur. (In this case, “Contact”.) Click “Next”.
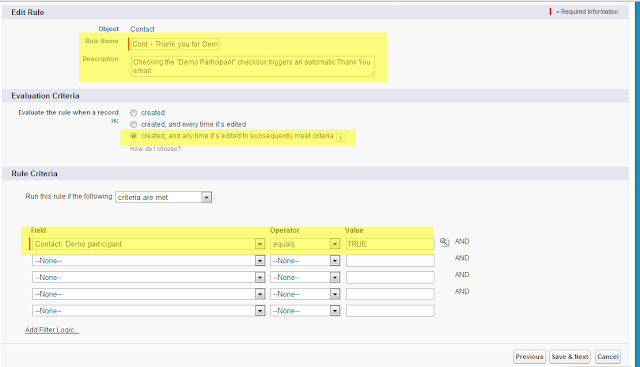
- Name and describe the rule. As a best practice, begin the rule name with the name of the object, or an abbreviation thereof. (When you have a lot of workflows, this helps keep related rules grouped together in the list.)
- Under Evaluation Criteria, choose “created, and any time it’s edited to subsequently meet criteria”.
- Under Rule Criteria, define the field values or formula test that will trigger the action. For this example “Contact: Demo Participant” + “equals” + “TRUE”
- Click “Save & Next”
Step 3: Add the Workflow Action
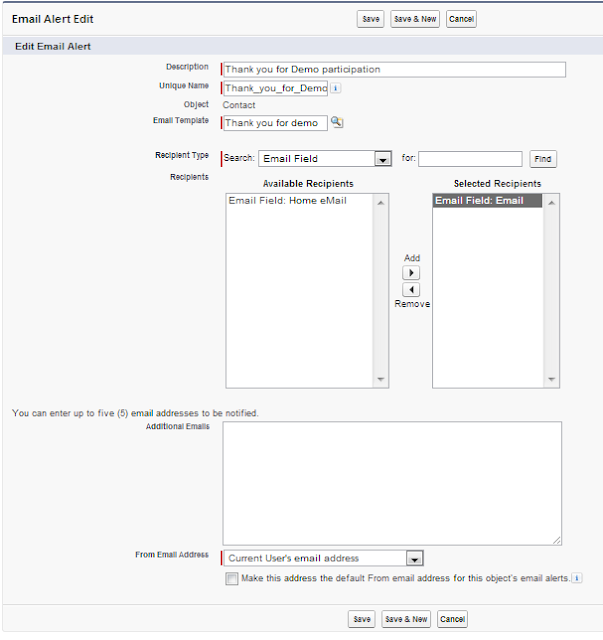
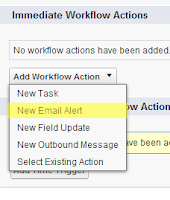
- Select “New Email Alert” from the Add Workflow Action menu. A new screen will appear.
- Add a short description (the unique name will auto-pupulate based on the description).
- Select your email template from the lookup.
- Under Recipient Type, select “Email Field” and from the dual panes below, select the correct contact email address.
- Click “Save.” On the final screen that appears, click “Activate“.

With the rapid evolution of technology, Salesforce solutions are ever-changing and improving features. Contact our team for up-to-date information.


